 Af Kurt Menke
This blog is the first in what will become an ongoing series of short blogs we will use to share QGIS tips and tricks.
Introduction
One of the areas of QGIS that has seen the most improvement in recent years is symbology and cartography. Here you will learn about a new QGIS feature introduced at QGIS version 3.14 Pi that allows you to customize legend patch shapes.
The purpose of a legend, is to explain to the map reader what different map symbols represent. Having more intuitive legend patch shapes can elevate a nice map to a unique individual work of art. Not only can these be completely custom shapes, a patch can also include multiple points, lines and polygons to more accurately depict what is seen on the map.
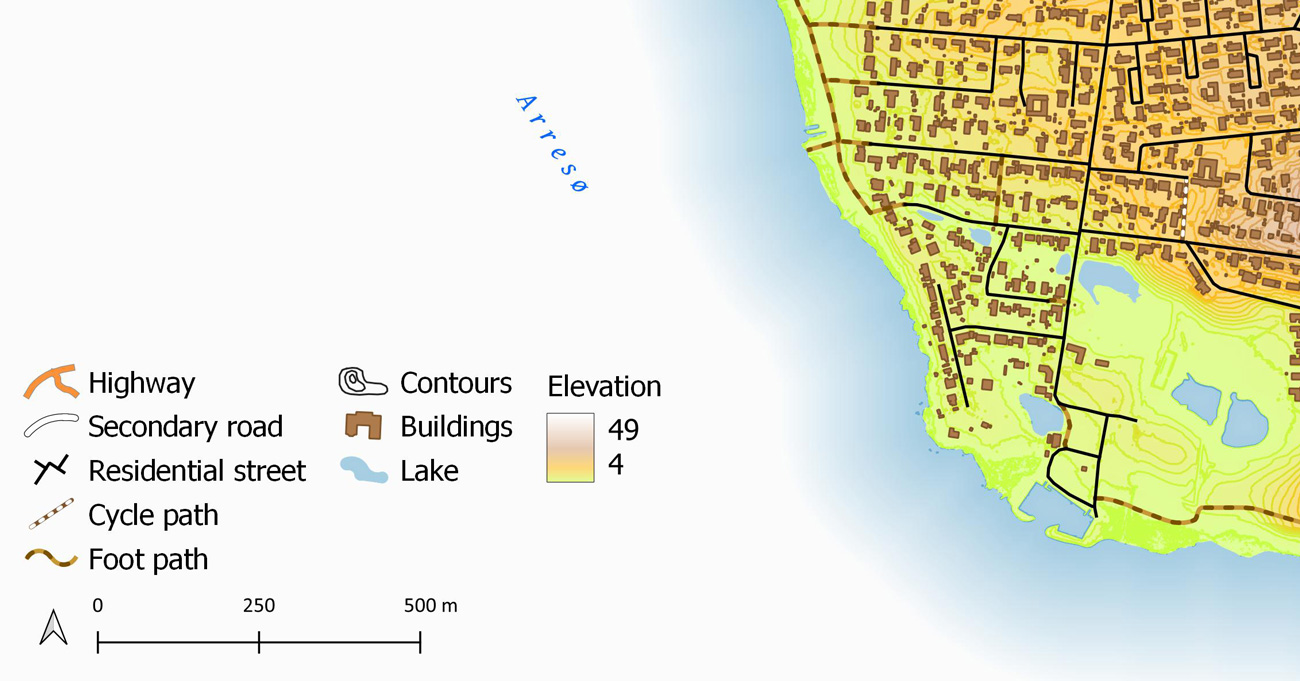
I will illustrate this with a simple map of Ramløse, Danmark. You can follow along with any of your maps. Below I provide both step-by-step instructions and animated gifs showing you the workflow.
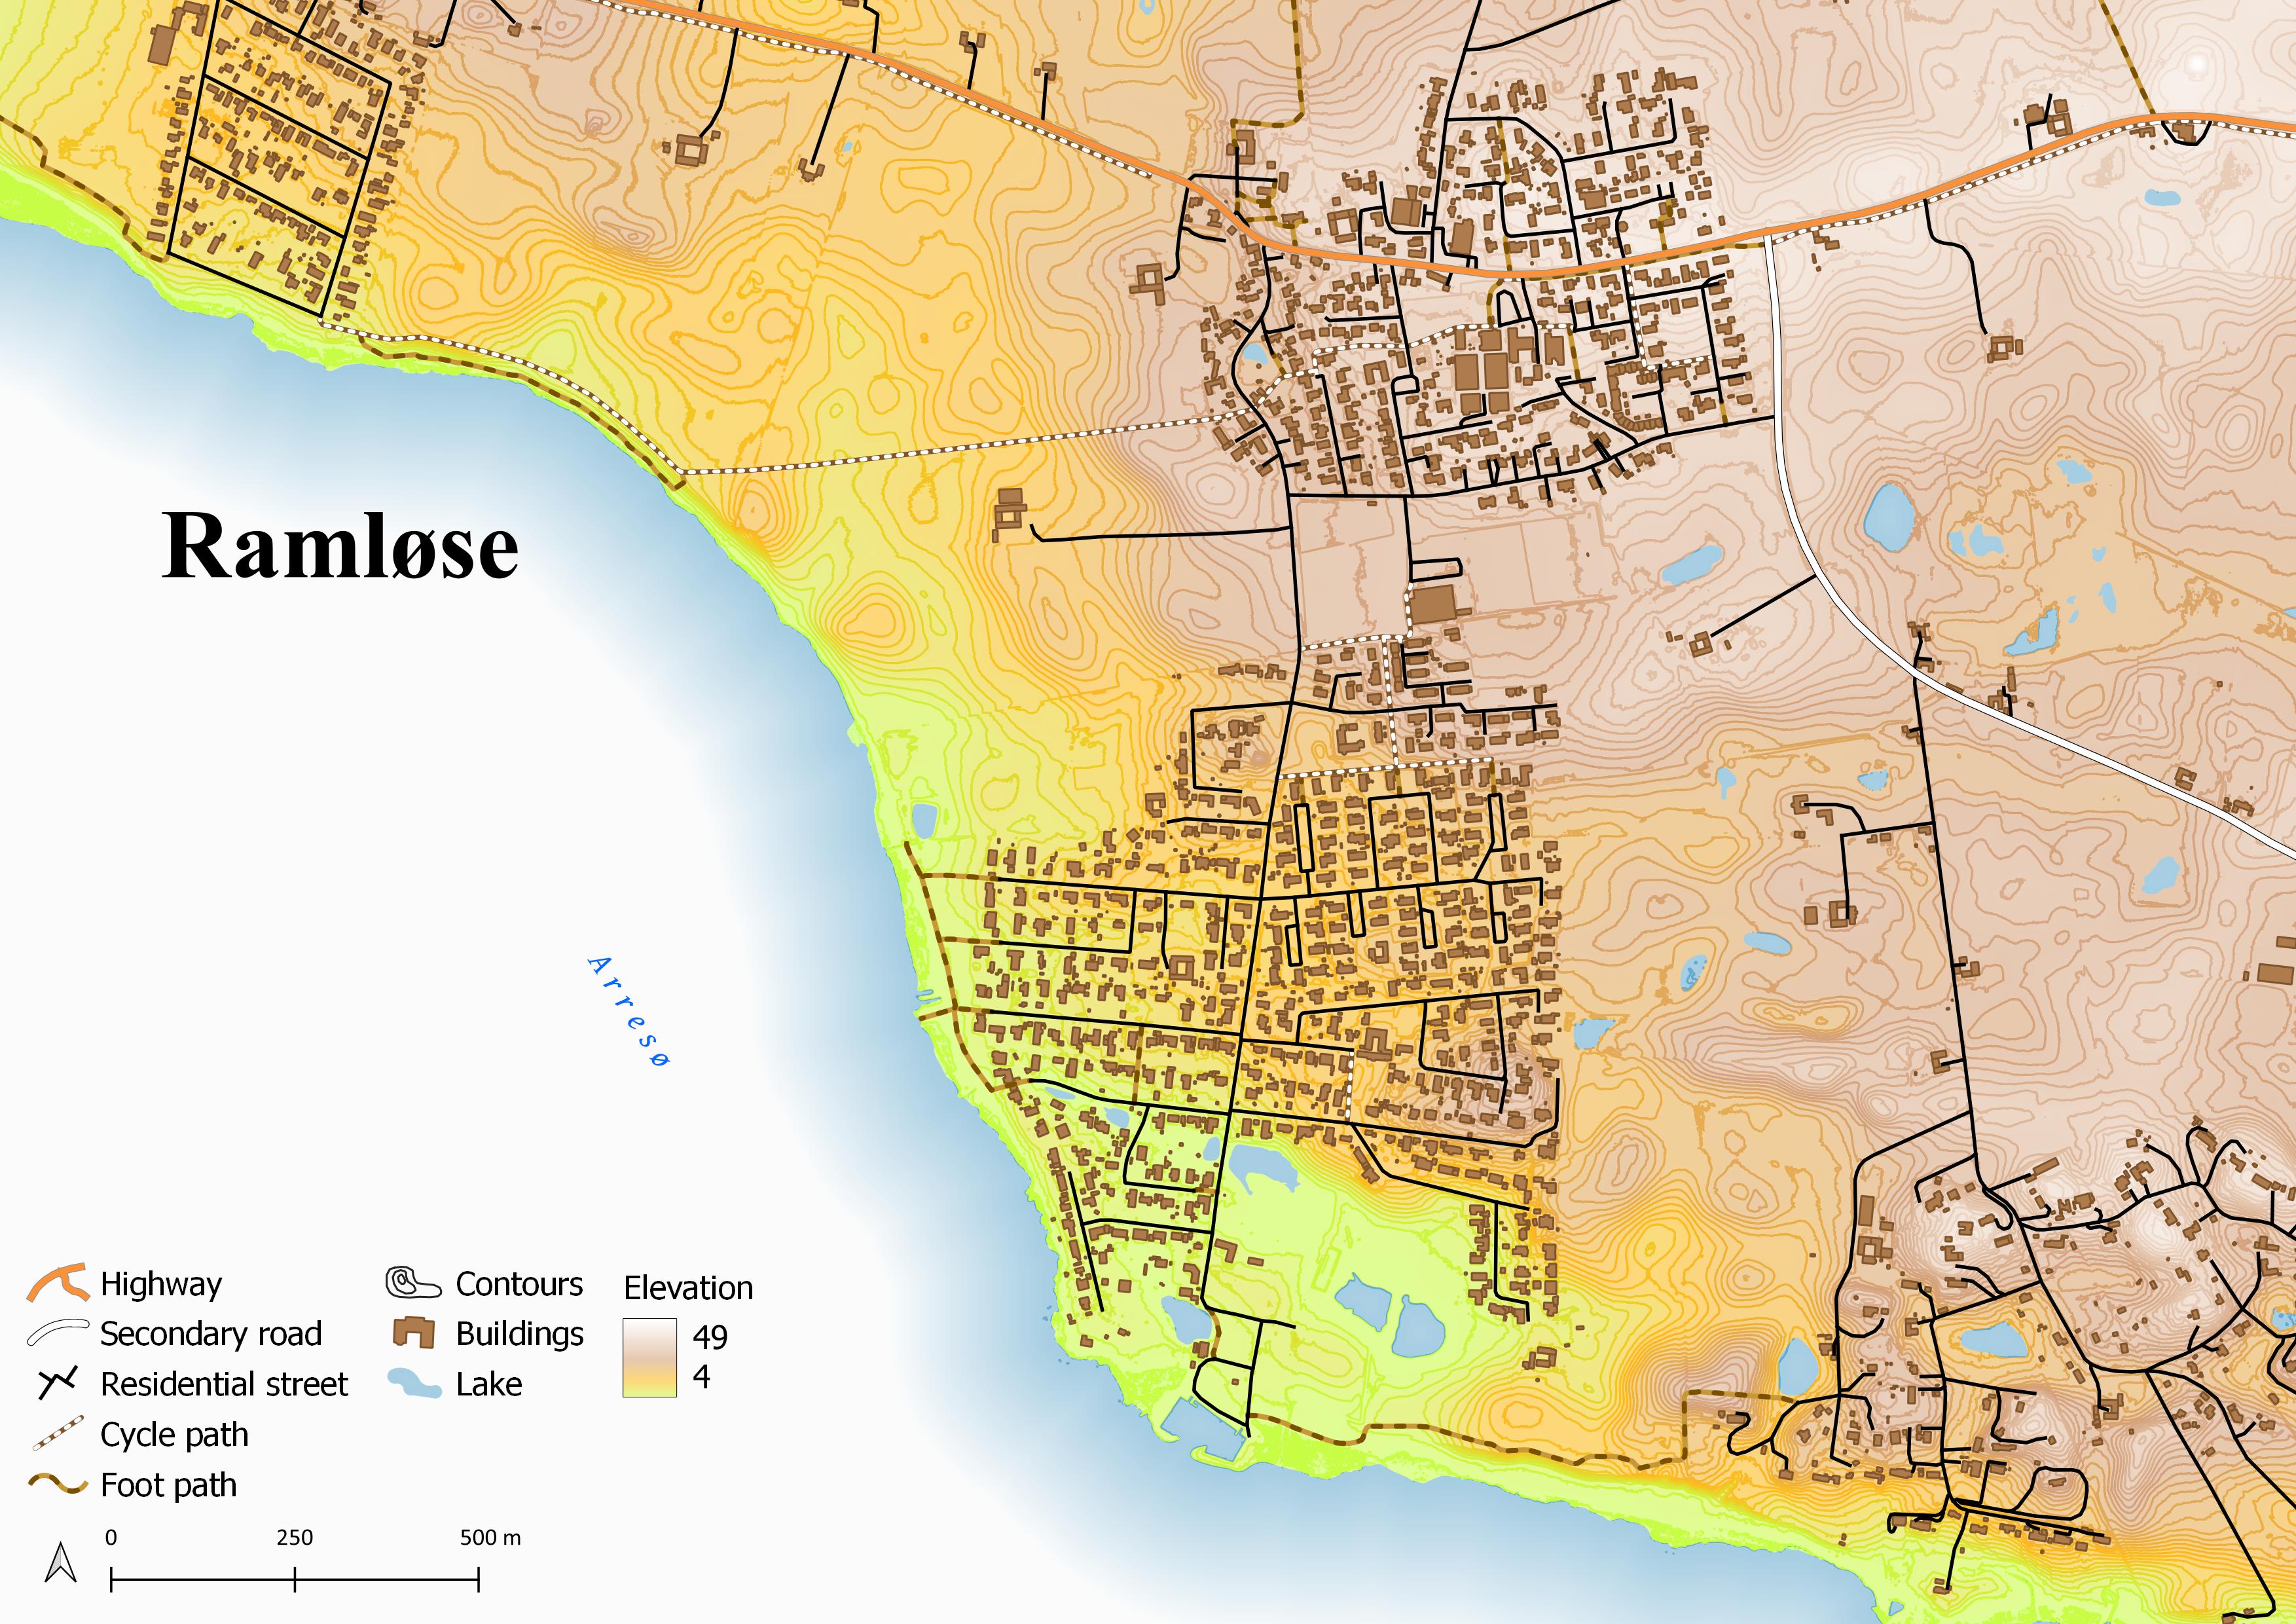
NOTE: This map displays another new legend feature introduced at QGIS v 3.18. Notice there is a gradient legend for the elevation layer!
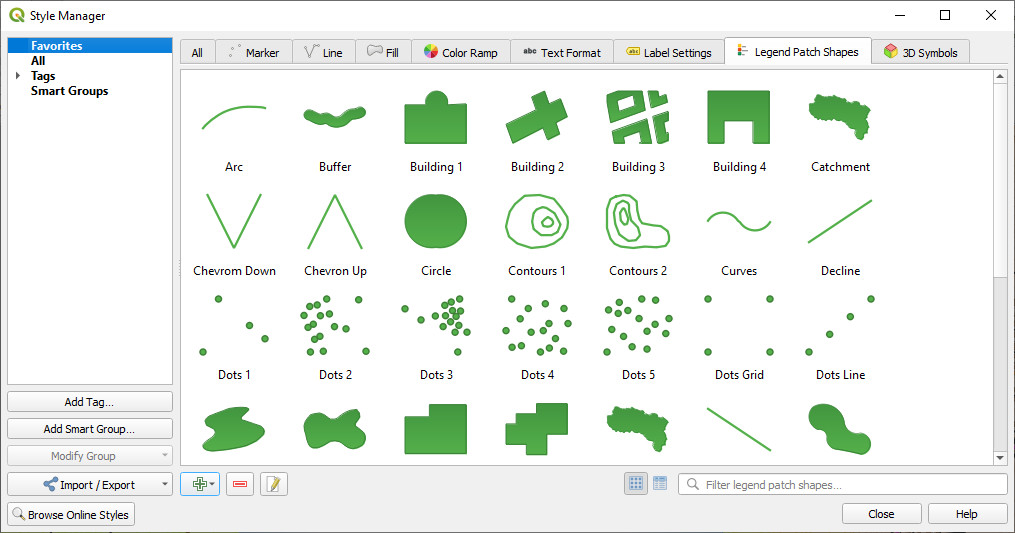
Legend patches are managed from the QGIS Style Manager. From here you can manage and create shapes for point, line and polygon patches. Initially you will not have any Legend Patches, as QGIS does not install with a default set. Below I will explain how to install some ready-made patches. Then you will learn how to design patches from existing features.
Importing Existing Legend Patches from GitHub
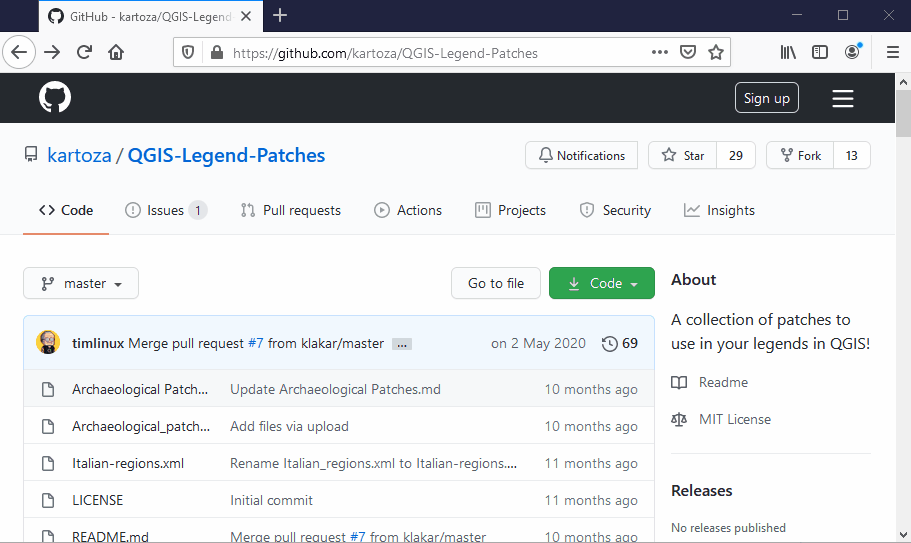
Here I will show you how to load some existing legend patches to QGIS. These are patches created by other members of the QGIS community, and made freely available to everyone. You will be using an online GitHub repository created by Kartoza: https://github.com/kartoza/QGIS-Legend-Patches. You can import them via a url.
- Click on the Style Manager button.
Here you can manage styles for Marker, Line and Polygon symbols, Color ramps, Text, Labels, Legend Patch Shapes and 3D Symbols.
- Open the link above to visit the GitHub QGIS Legend Patch repository
- Click on the klas-karlsson-patches.xml link.
- Click the Raw button and copy the URL.
- Back at the Style Manager choose the Legend Patch Shapes tab.
- In the lower left corner click the Import/Export → Import Item(s) button. The Import Items(s) window will open.
- Set Import from to URL
- Paste the URL into the URL box.
- Click Fetch Items
- If you want them added to Favorite styles you can click the Add to favorites check box.
- Klas Karlsson has already tagged these shapes. If you don’t want to import these tags click Do not import embedded tags.
- Note you can also add your own tags
- Click Select All
- Click Import
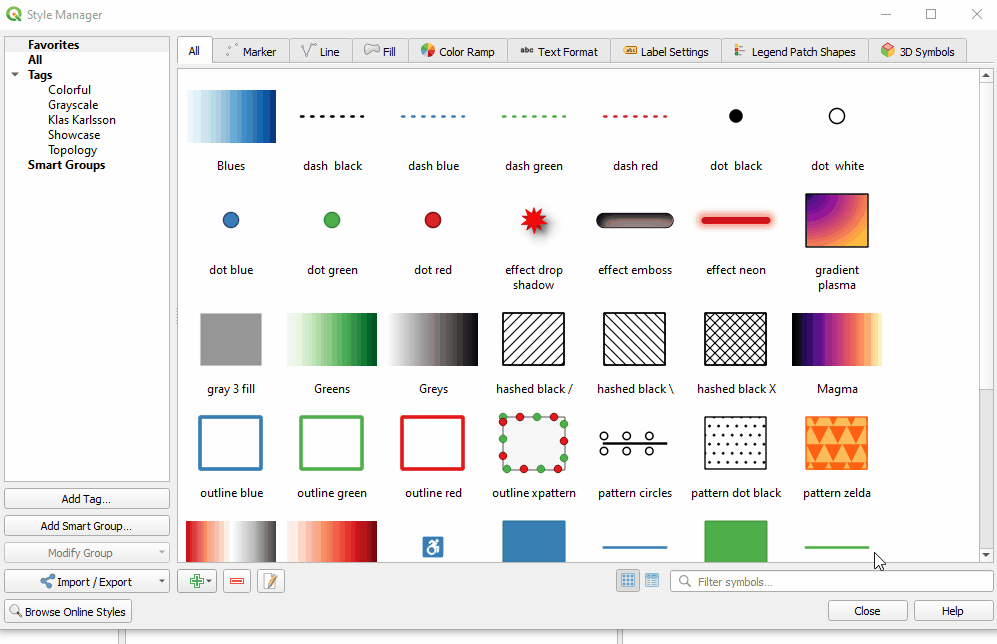
You will now see more than 30 new legend patches to choose from. These include legend patch shapes for polygon, line and point layers.
Applying Legend Patches to Items in a Legend
Here you will learn how to apply a legend patch to a legend item in the Print composer.
- Close the Style Manager
- Return to the Print Composer
- Select the Legend object on the map
- On the Item Properties tab find the Legend Items section. Double-click on a layer to apply a custom legend patch.
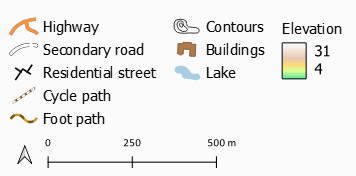
- Click on the Shape button
- Choose a legend patch. Here you can also choose to Preserve the Aspect Ratio and adjust the legend patch size. Notice that you will also see the geometry of the legend patch as an expression. You can edit the geometry of any patch with the Style Manager by editing this expression.
- Click the blue back button, and you will have a custom legend patch applied.
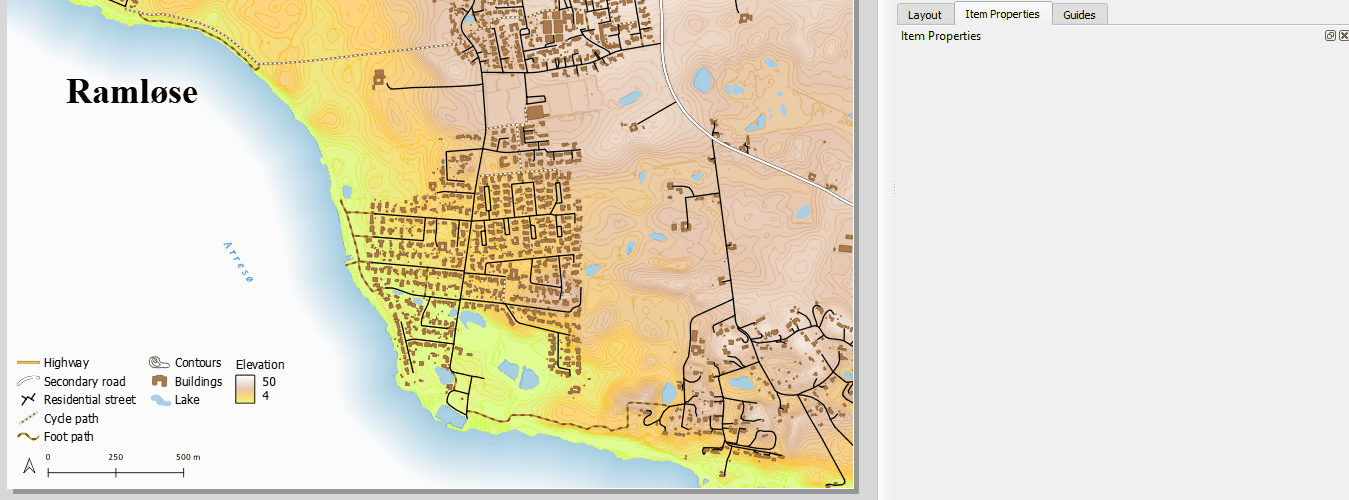
As you can see, choosing patches from the Klas Karlsson set makes the legend much more interesting and intuitive than straight lines and rectangular legend patches.
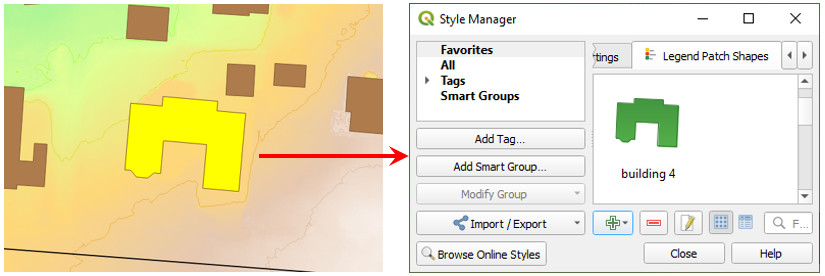
Creating a Custom Legend Patch from a Feature
Now we will take it a bit further. I will describe how to create a legend patch from an existing feature. Note that you can also use these steps to create a legend patch from a feature you digitize, just for the purposes of creating a custom legend patch shape.
- Return to the main QGIS map canvas. Find a feature you would like to use as a legend patch.
- Click the Toggle editing button to put this layer into edit mode
- Use the Select Features tool to select the feature
- On the Digitizing toolbar click the Copy features button. You can now toggle out of Editing mode.
- Open the Style Manager
- Switch to the Legend Patch Shapes tab
- Click the green plus Add item button and choose the appropriate Marker, Line or Fill Legend Patch Shapes
- There will be a basic geometry expression in the Shape box. Delete this code, and click Ctrl + C to paste the geometry of your feature as wkt. The geometry of your feature is pasted into the Shape box
- Now you need to edit this. Any attributes from your layer are included, and you only need the geometry. Scroll
to the top and delete everything before the
Multipolygonline or other geometric function (Multiline,Multipoint,Compoundcurve…) depending on the geometry of your legend patch. - Scroll to the bottom and delete anything after the closing
))).
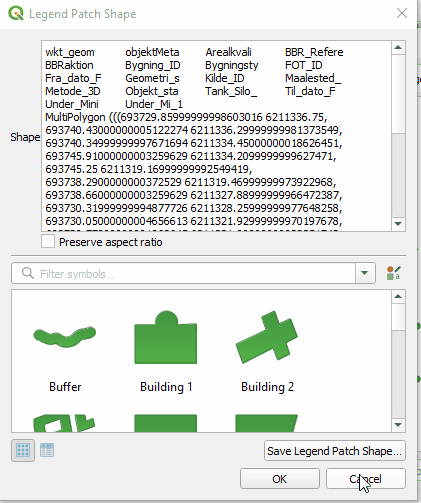
- You now have a new custom legend patch shape!
Using these steps, you can build your library of legend patch shapes to meet your cartographic needs! You can also use this workflow with an empty map canvas and a temporary scratch layer to digitize a custom shape for a new legend patch.